Party-Wall Cockpit — Quick Start
Follow one real case — PW-EZNMGSDP — from enquiry to closed. This is the shortest complete path: the neighbour consents (Route A). Do these eleven steps once and you will know how the whole Cockpit works.
The single idea to keep in your head: record ≠ serve. Almost every button here records a fact, a draft, or an intention. It does not send letters, sign documents, or start statutory clocks on its own. Real outside effects happen only inside the stage engines you launch with "Run stage" buttons — and only after you approve a gate.
1. What you'll do
You will create a case, qualify it, set it up, work out which notices are needed, prepare them for serving, approve the serve, record the neighbour's consent, capture the milestones (Schedule of Condition and Award), run the works and invoicing engines, and close the case.
| # | Step | Case status after |
|---|---|---|
| 1 | New case wizard | Prospect |
| 2 | Qualify case → approve the qualification gate (sends the quote + mandate) | Prospect |
| — | The building owner signs the mandate | Live |
| 3 | Set up case | Live |
| 4 | Determine notices | Live |
| 5 | Serve notices | Live |
| 6 | Approve the serve gate | Live |
| 7 | Record AO response (consent) → Route A | Live |
| 8 | Record SoC (no Award on Route A) | Live |
| 9 | Start works engine → Mark works done | Live |
| 10 | Start invoicing engine → Record invoice → Record payment | Live |
| 11 | Close case | Closed |
2. Before you start
Open https://cockpit.axon-dev.top and sign in with your username and password — the same ones you were given for the Cockpit.
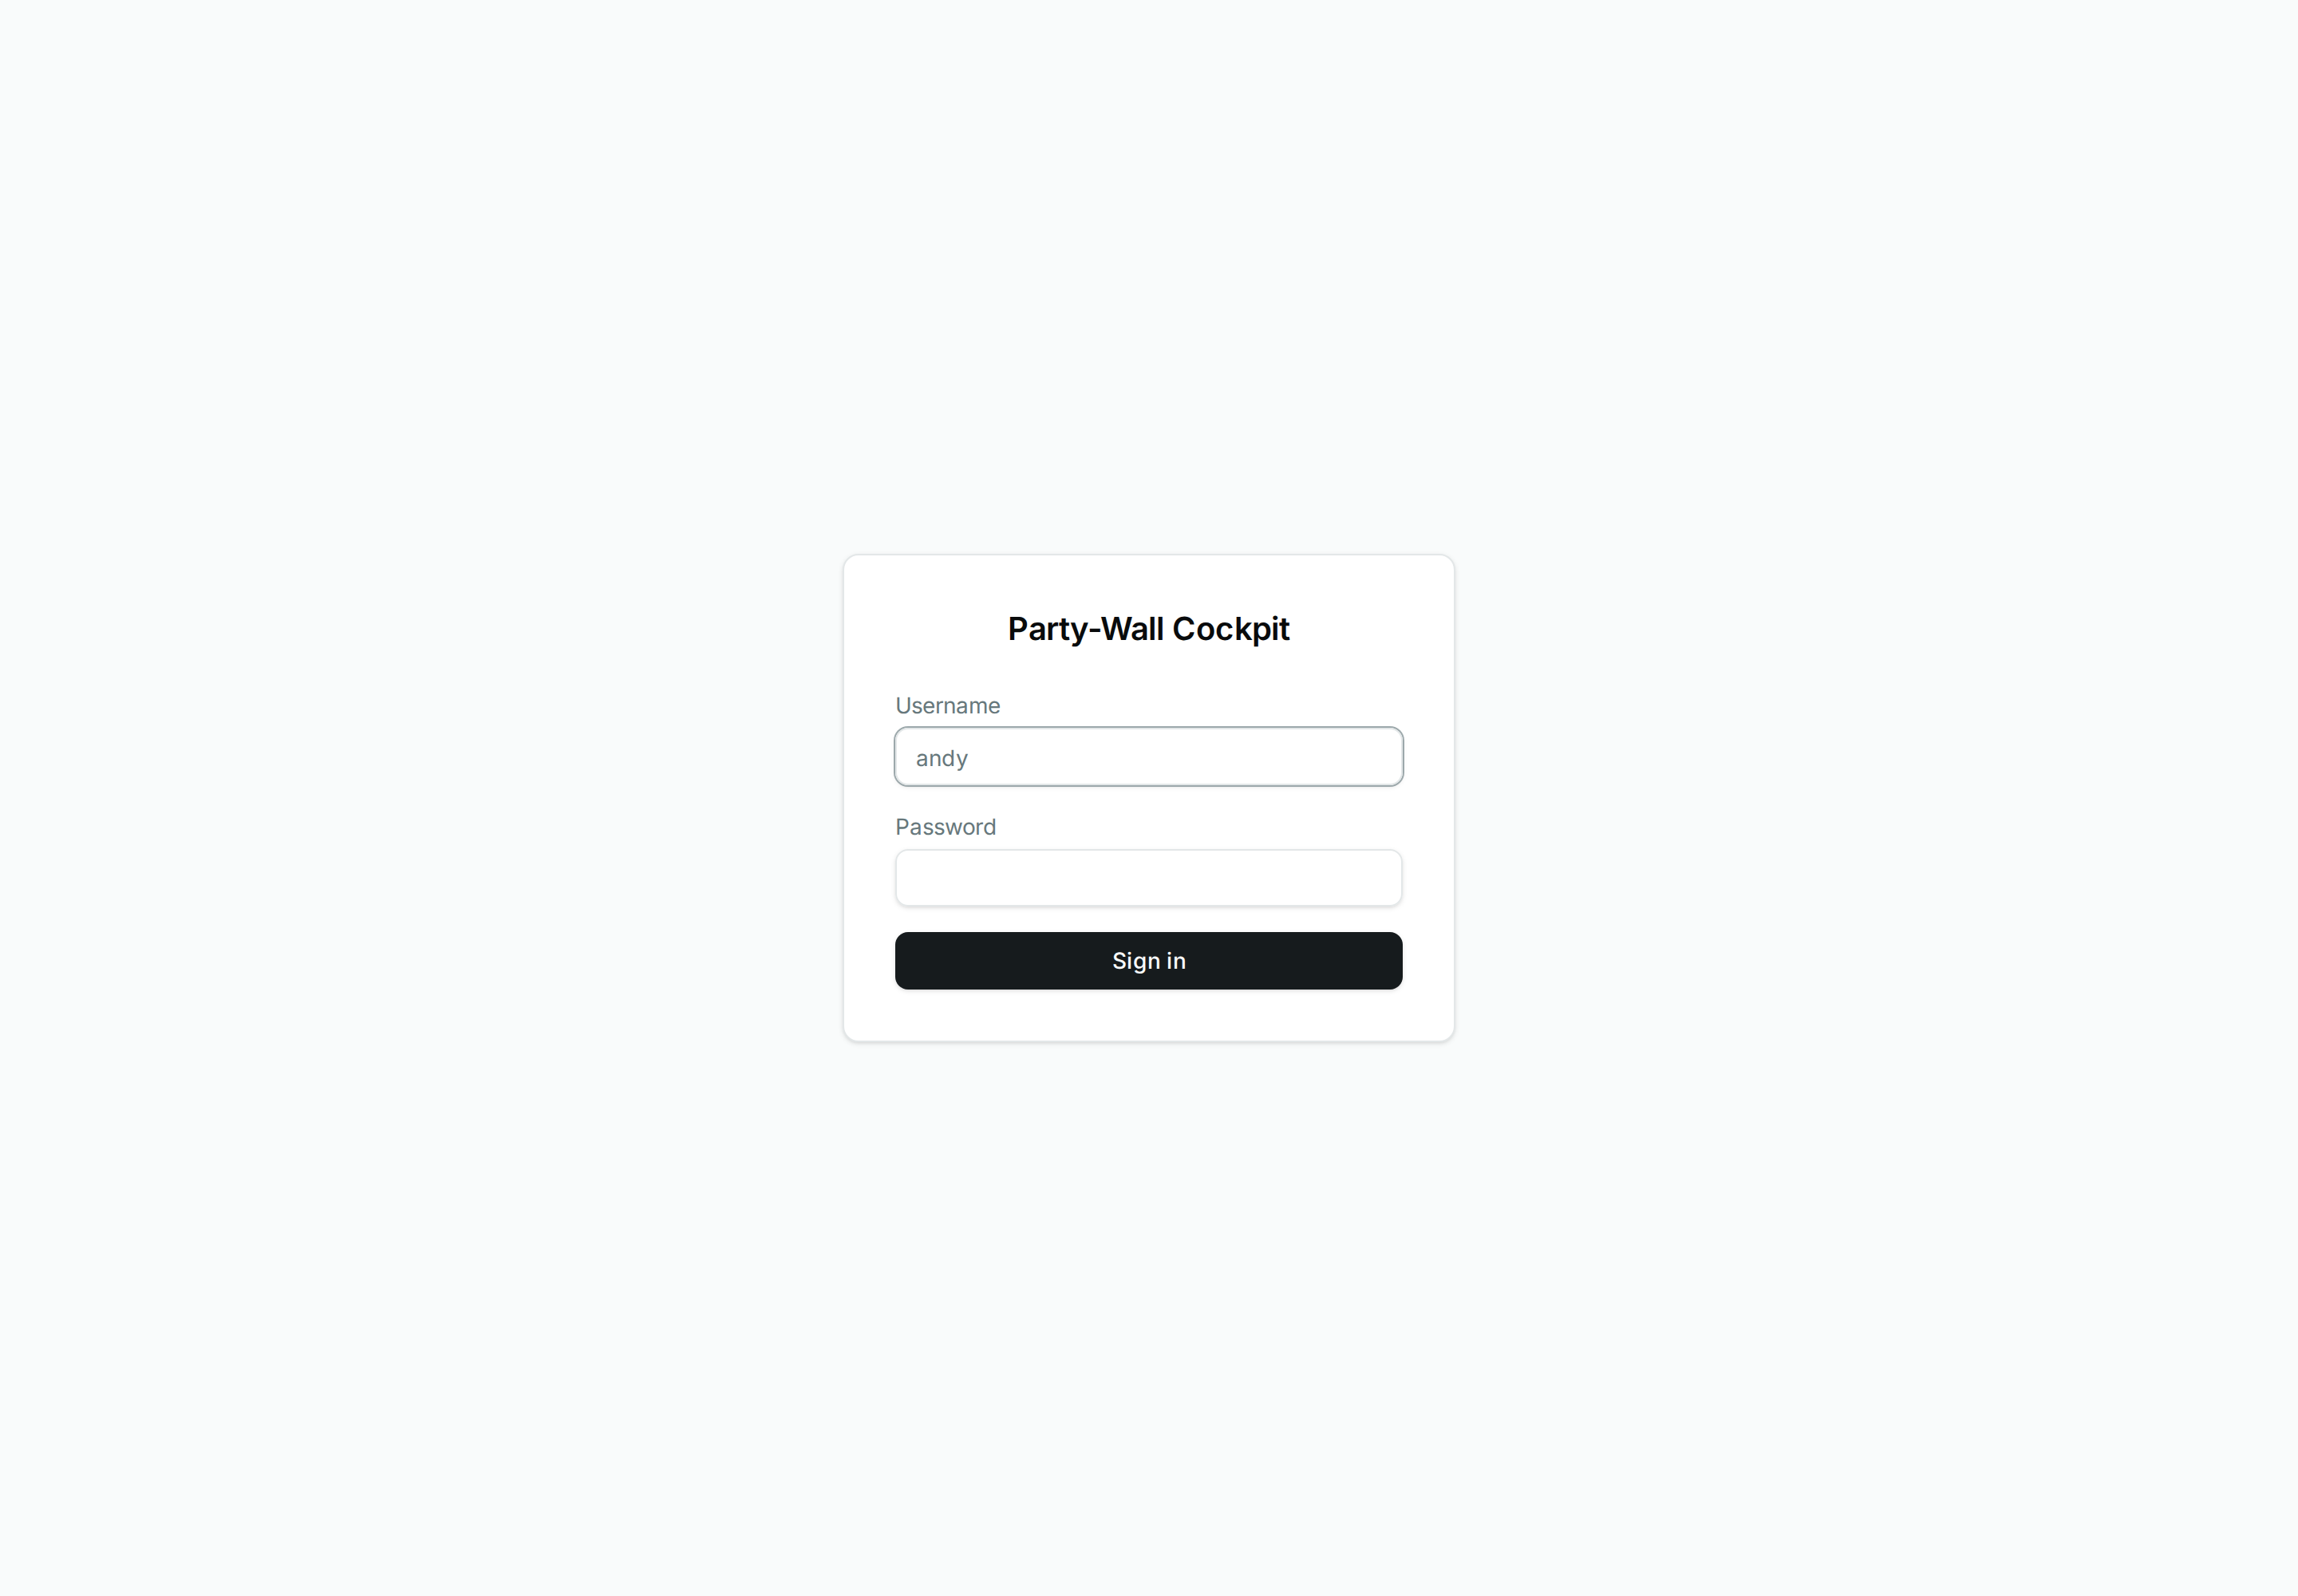 Figure — the sign-in screen. Your login is the same username and password as before; there is no separate registration.
Once inside, check the left sidebar. Your role is Surveyor (Operator): the sidebar shows your role as Surveyor beneath your name. The name above it (for example "Andy (PWMS case handler)", or "Administrator" on the demo account) is your display name, not a role.
Write mode vs read-only
You need write mode to run this tutorial. In write mode the Quick actions bar of buttons is visible on the case screen. If that bar is missing and you cannot act, you are in read-only mode — ask an administrator to grant write access before continuing. (There is no separate "read-only" banner; the only sign is that the Quick actions bar does not appear.)
3. Where you are
Every case opens on the case screen. The left column is your work area (drawing analysis, the stage checklist, documents). The right rail explains the case's state (operator context, statutory clocks, parties, fees, automation). Across the top is the stage track — a metro line from Lead to Closed — with a separate lane for each adjoining owner showing its route.
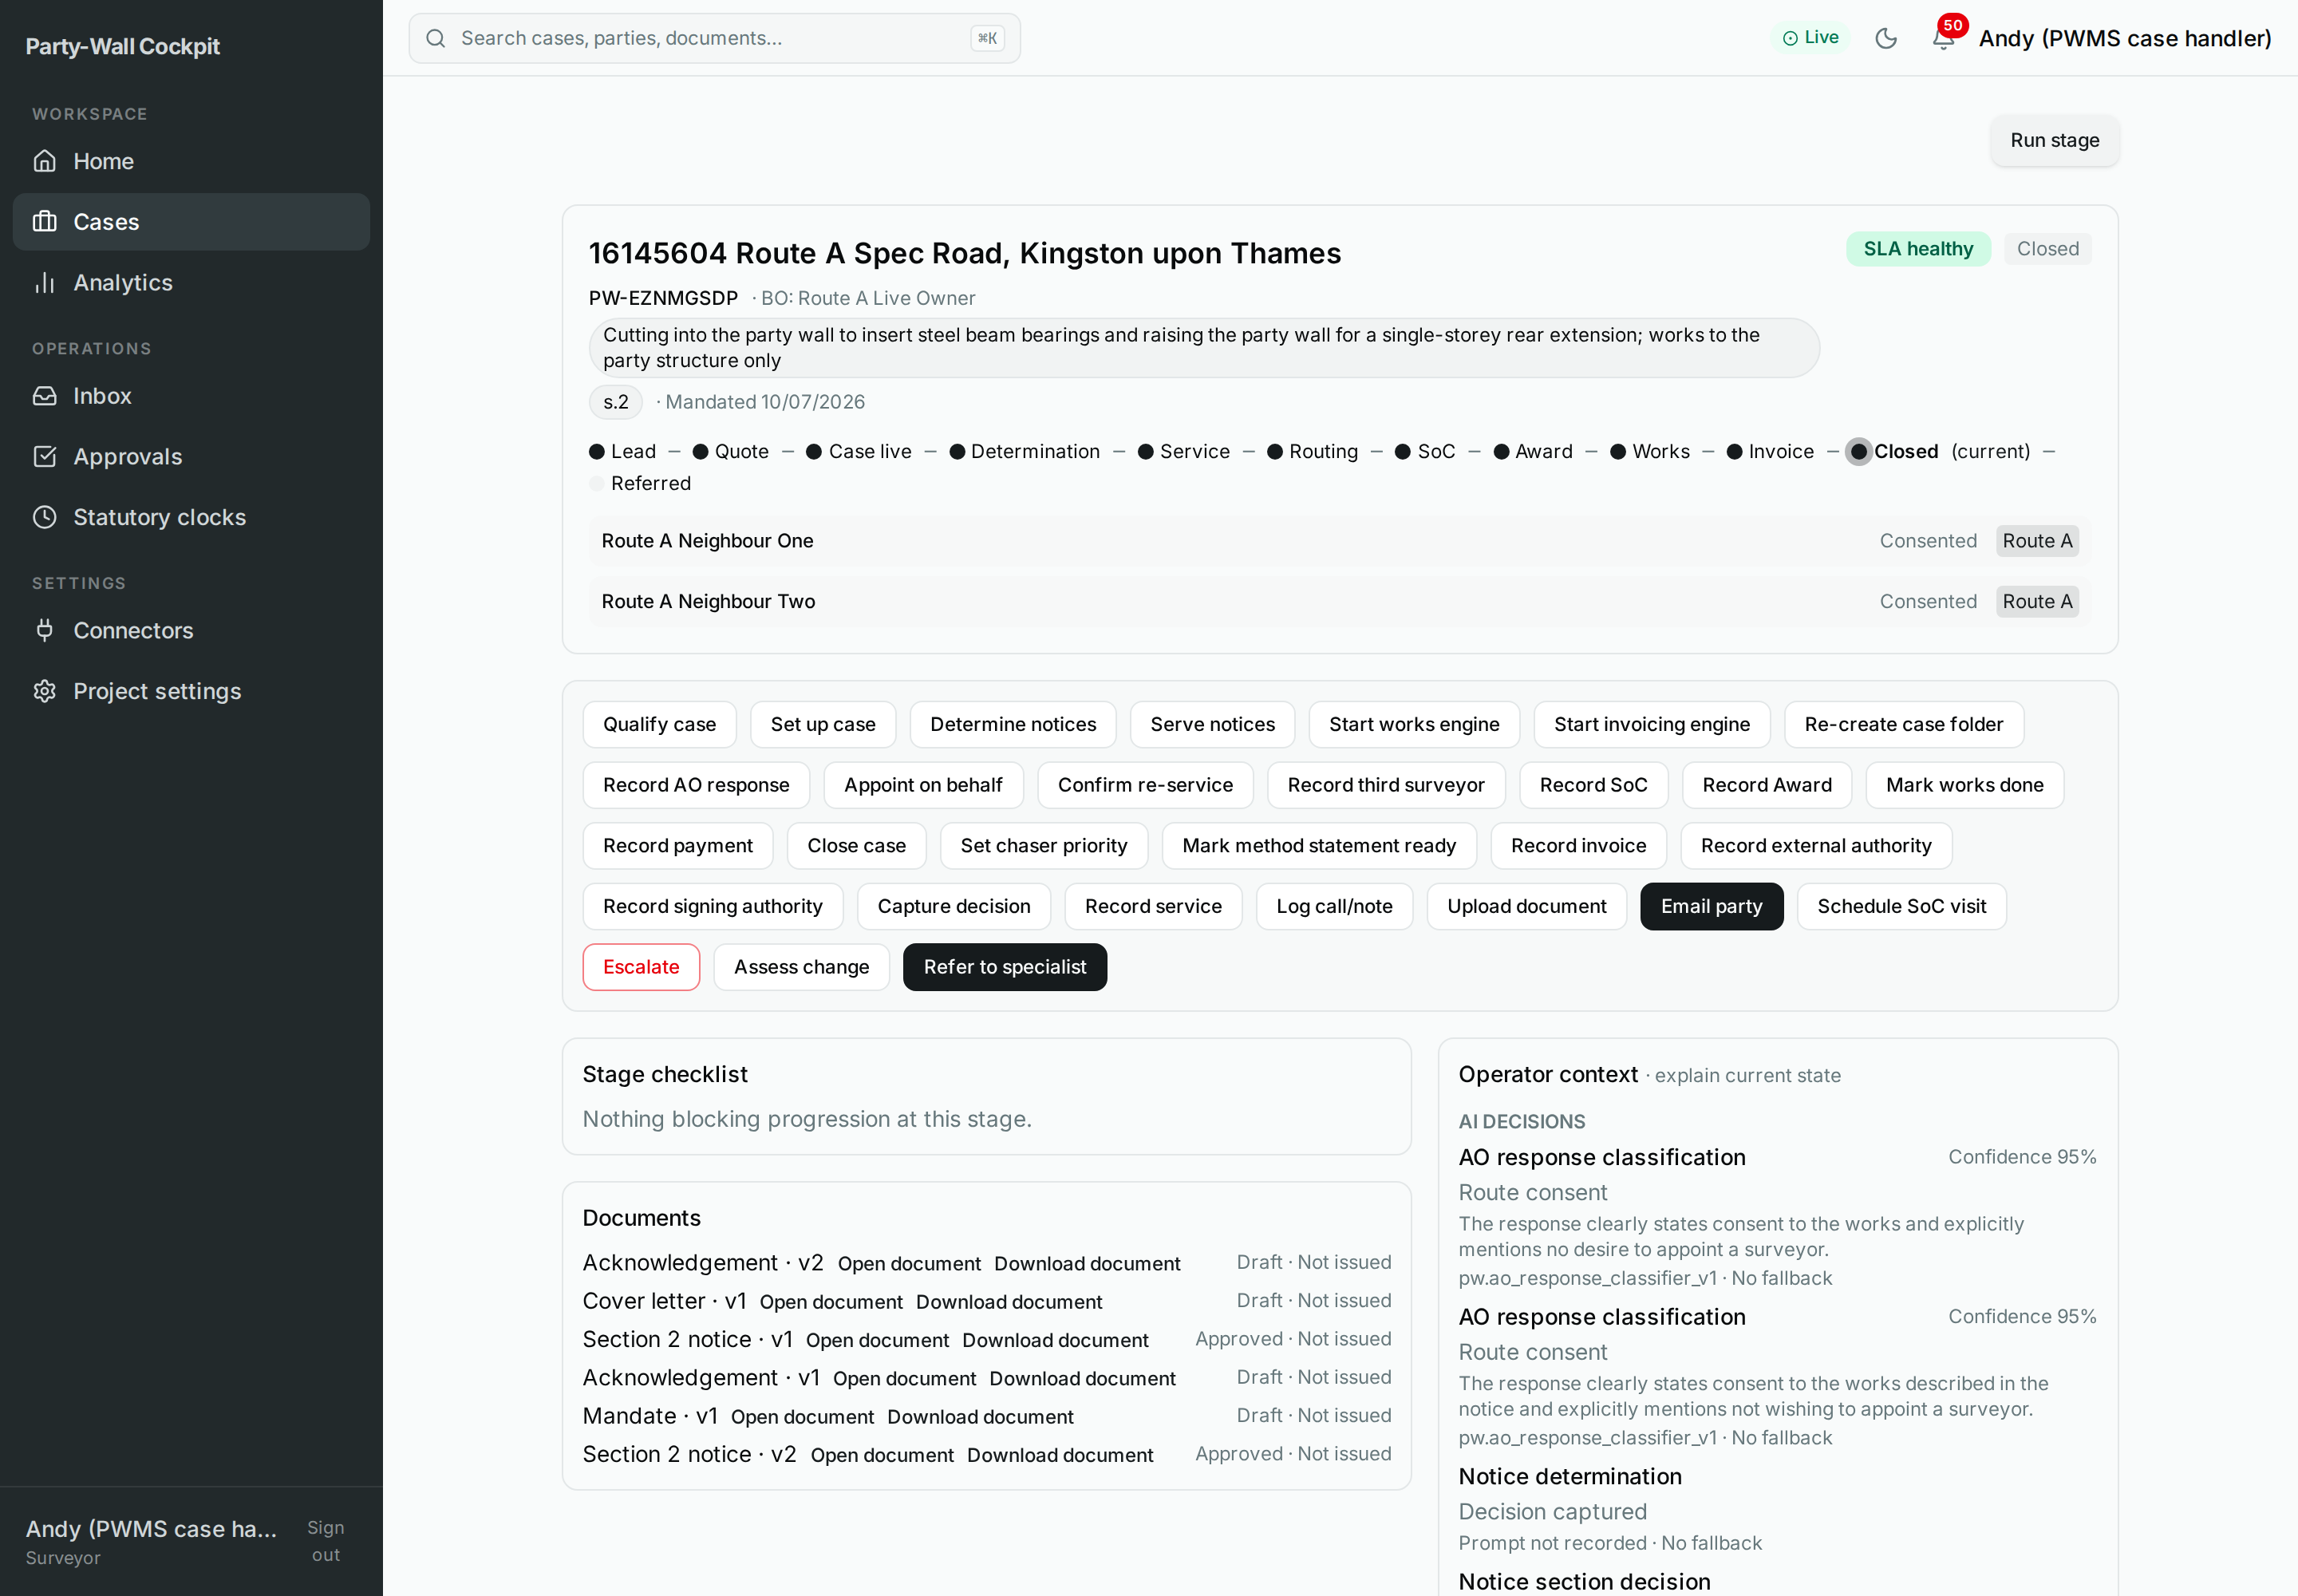 Figure — the case screen. Identity and health sit at the top; your action buttons are in the Quick actions bar; the right rail explains why the case is where it is.
4. The case at a glance
A case moves along a track: Lead → Quote → Case live → Determination → Service → Routing → SoC → Award → Works → Invoice → Closed. Each adjoining owner (AO) travels its own lane, and its route (A, B, C or D) is decided by how that neighbour responds. In this tutorial the neighbour consents, so the lane takes Route A and the case runs straight to closing.
5. Step-by-step (Route A: the neighbour consents)
Each step below gives you three lines: You click, What happens, and Safe?.
Step 1 — New case wizard
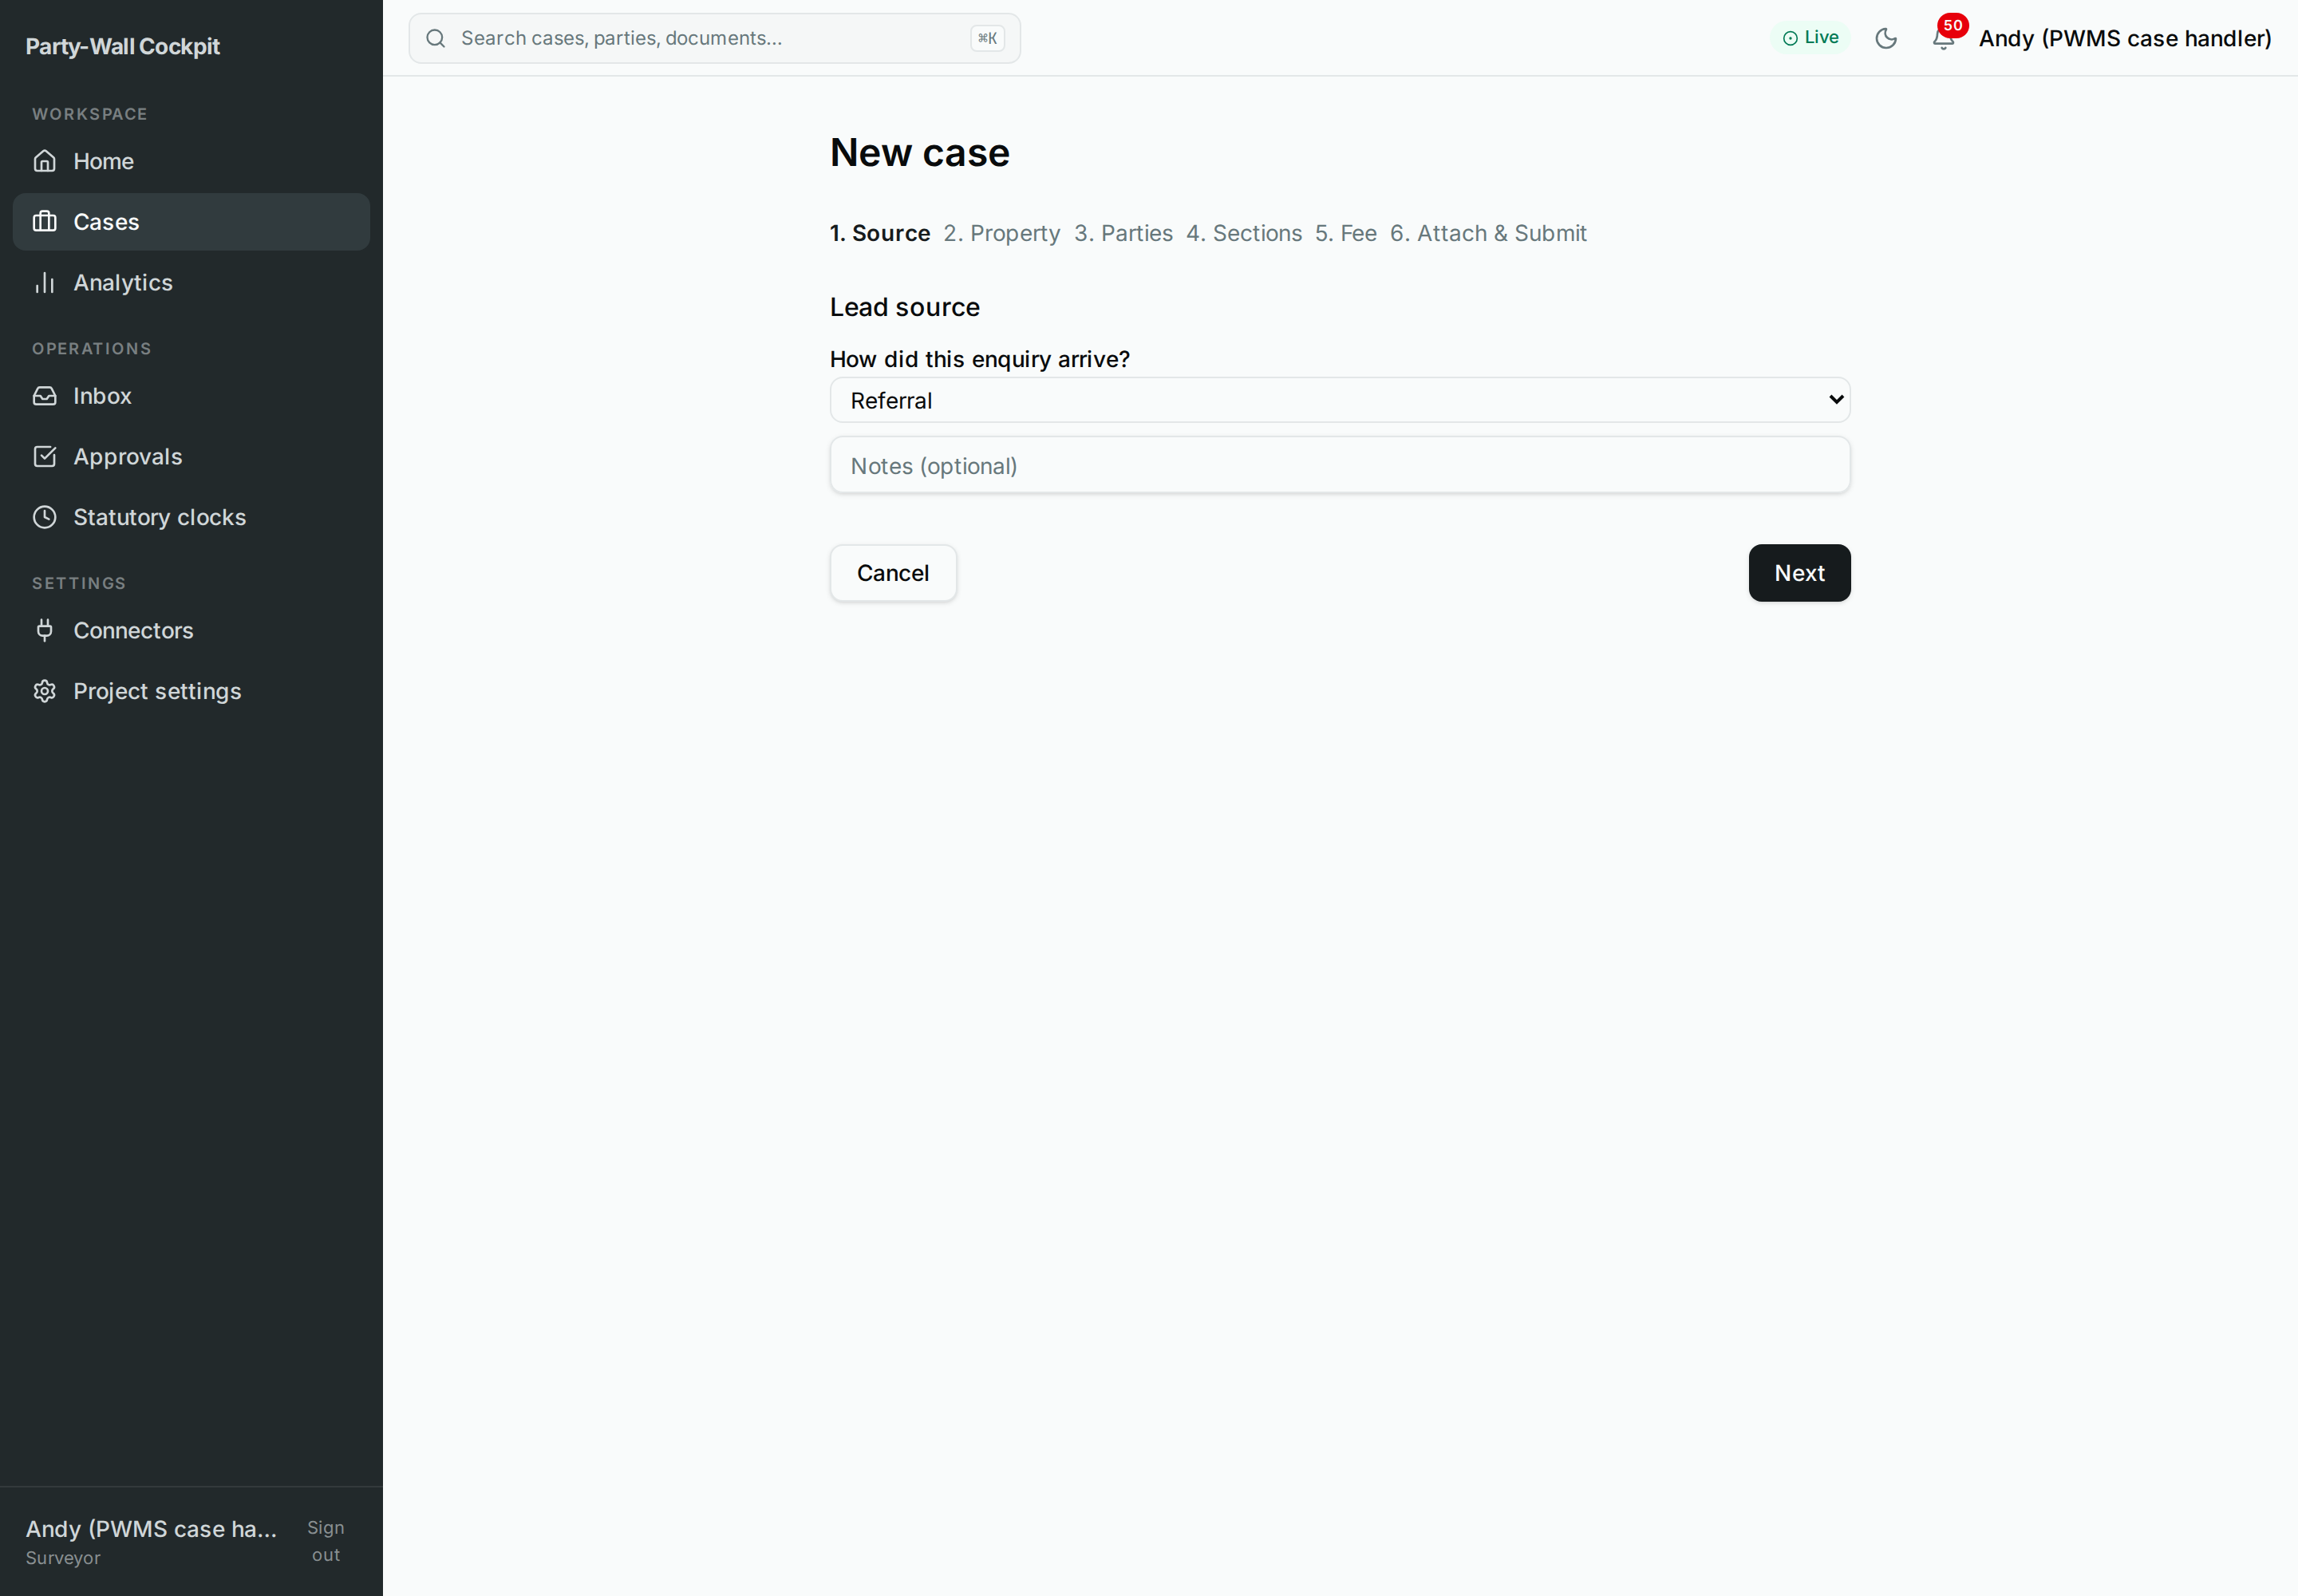 Figure — the six-step new-case wizard on
 /cases/new. It records the case; it does not start any workflow yet.
- You click: Cases in the sidebar → New case, then fill the six steps (Source → Property → Parties → Sections → Fee → Attach & submit) and press Create case. You must give a site address, a works description, and at least one adjoining owner.
- What happens: the system creates the case as a Prospect and records the details you typed. Nothing is served and no engine starts.
- Safe? Yes — this only records a draft case. You can edit details afterwards.
Step 2 — Qualify case
- You click: on the case screen, the Qualify case chip in the Quick actions bar, then confirm in the confirmation dialog (Decline / Accept).
- What happens: the qualification stage starts and raises an approval gate ("Qualify this Party Wall matter and proceed to quote + mandate?") in the Requires your approval section. When you approve that gate, the system emails the building owner a fee quote and issues a BoldSign mandate for them to sign — these are real external sends.
- Safe? This is a real external step, but it is gated: nothing is sent until you approve the qualification gate. Read it before approving. The case stays a Prospect until the owner signs the mandate.
The building owner signs the mandate
Between qualifying and setting up there is a step you do not click: the building owner opens the BoldSign email and signs the mandate. The moment they sign, the case automatically becomes Live and its setup runs. This client-signing step — not a Cockpit button — is what turns the case from Prospect to Live.
Step 3 — Set up case
- You click: the Set up case chip, then confirm.
- What happens: the setup engine provisions the case folder and links the connectors it needs. The case is already Live — it became Live when the owner signed the mandate. Setup normally runs automatically on signing; the Set up case button lets you run or re-run it if needed.
- Safe? Yes. If the folder step ever fails, a Re-create case folder button lets you rebuild it — use that only if setup failed.
Step 4 — Determine notices
- You click: the Determine notices chip, then confirm.
- What happens: the system works out which statutory notices this case needs, based on the sections (S1/S2/S6) and the parties.
- Safe? Yes — it decides what is needed; it does not prepare or send anything yet.
Step 5 — Serve notices
- You click: the Serve notices chip, then confirm. The confirmation text reads "…opens the required approval gates. Nothing is sent automatically."
- What happens: the serve engine prepares the notices and opens approval gates. It queues the work for your authorisation — nothing is served, emailed or signed until you approve.
- Safe? Yes — at this point the case is waiting on you. No neighbour has been contacted.
This is the important gate
"Serve notices" does not serve anything. It prepares the notices and asks for your approval. The statutory clock and any real service happen only after you approve in the next step. If you never approve, nothing goes out.
Step 6 — Approve the serve gate
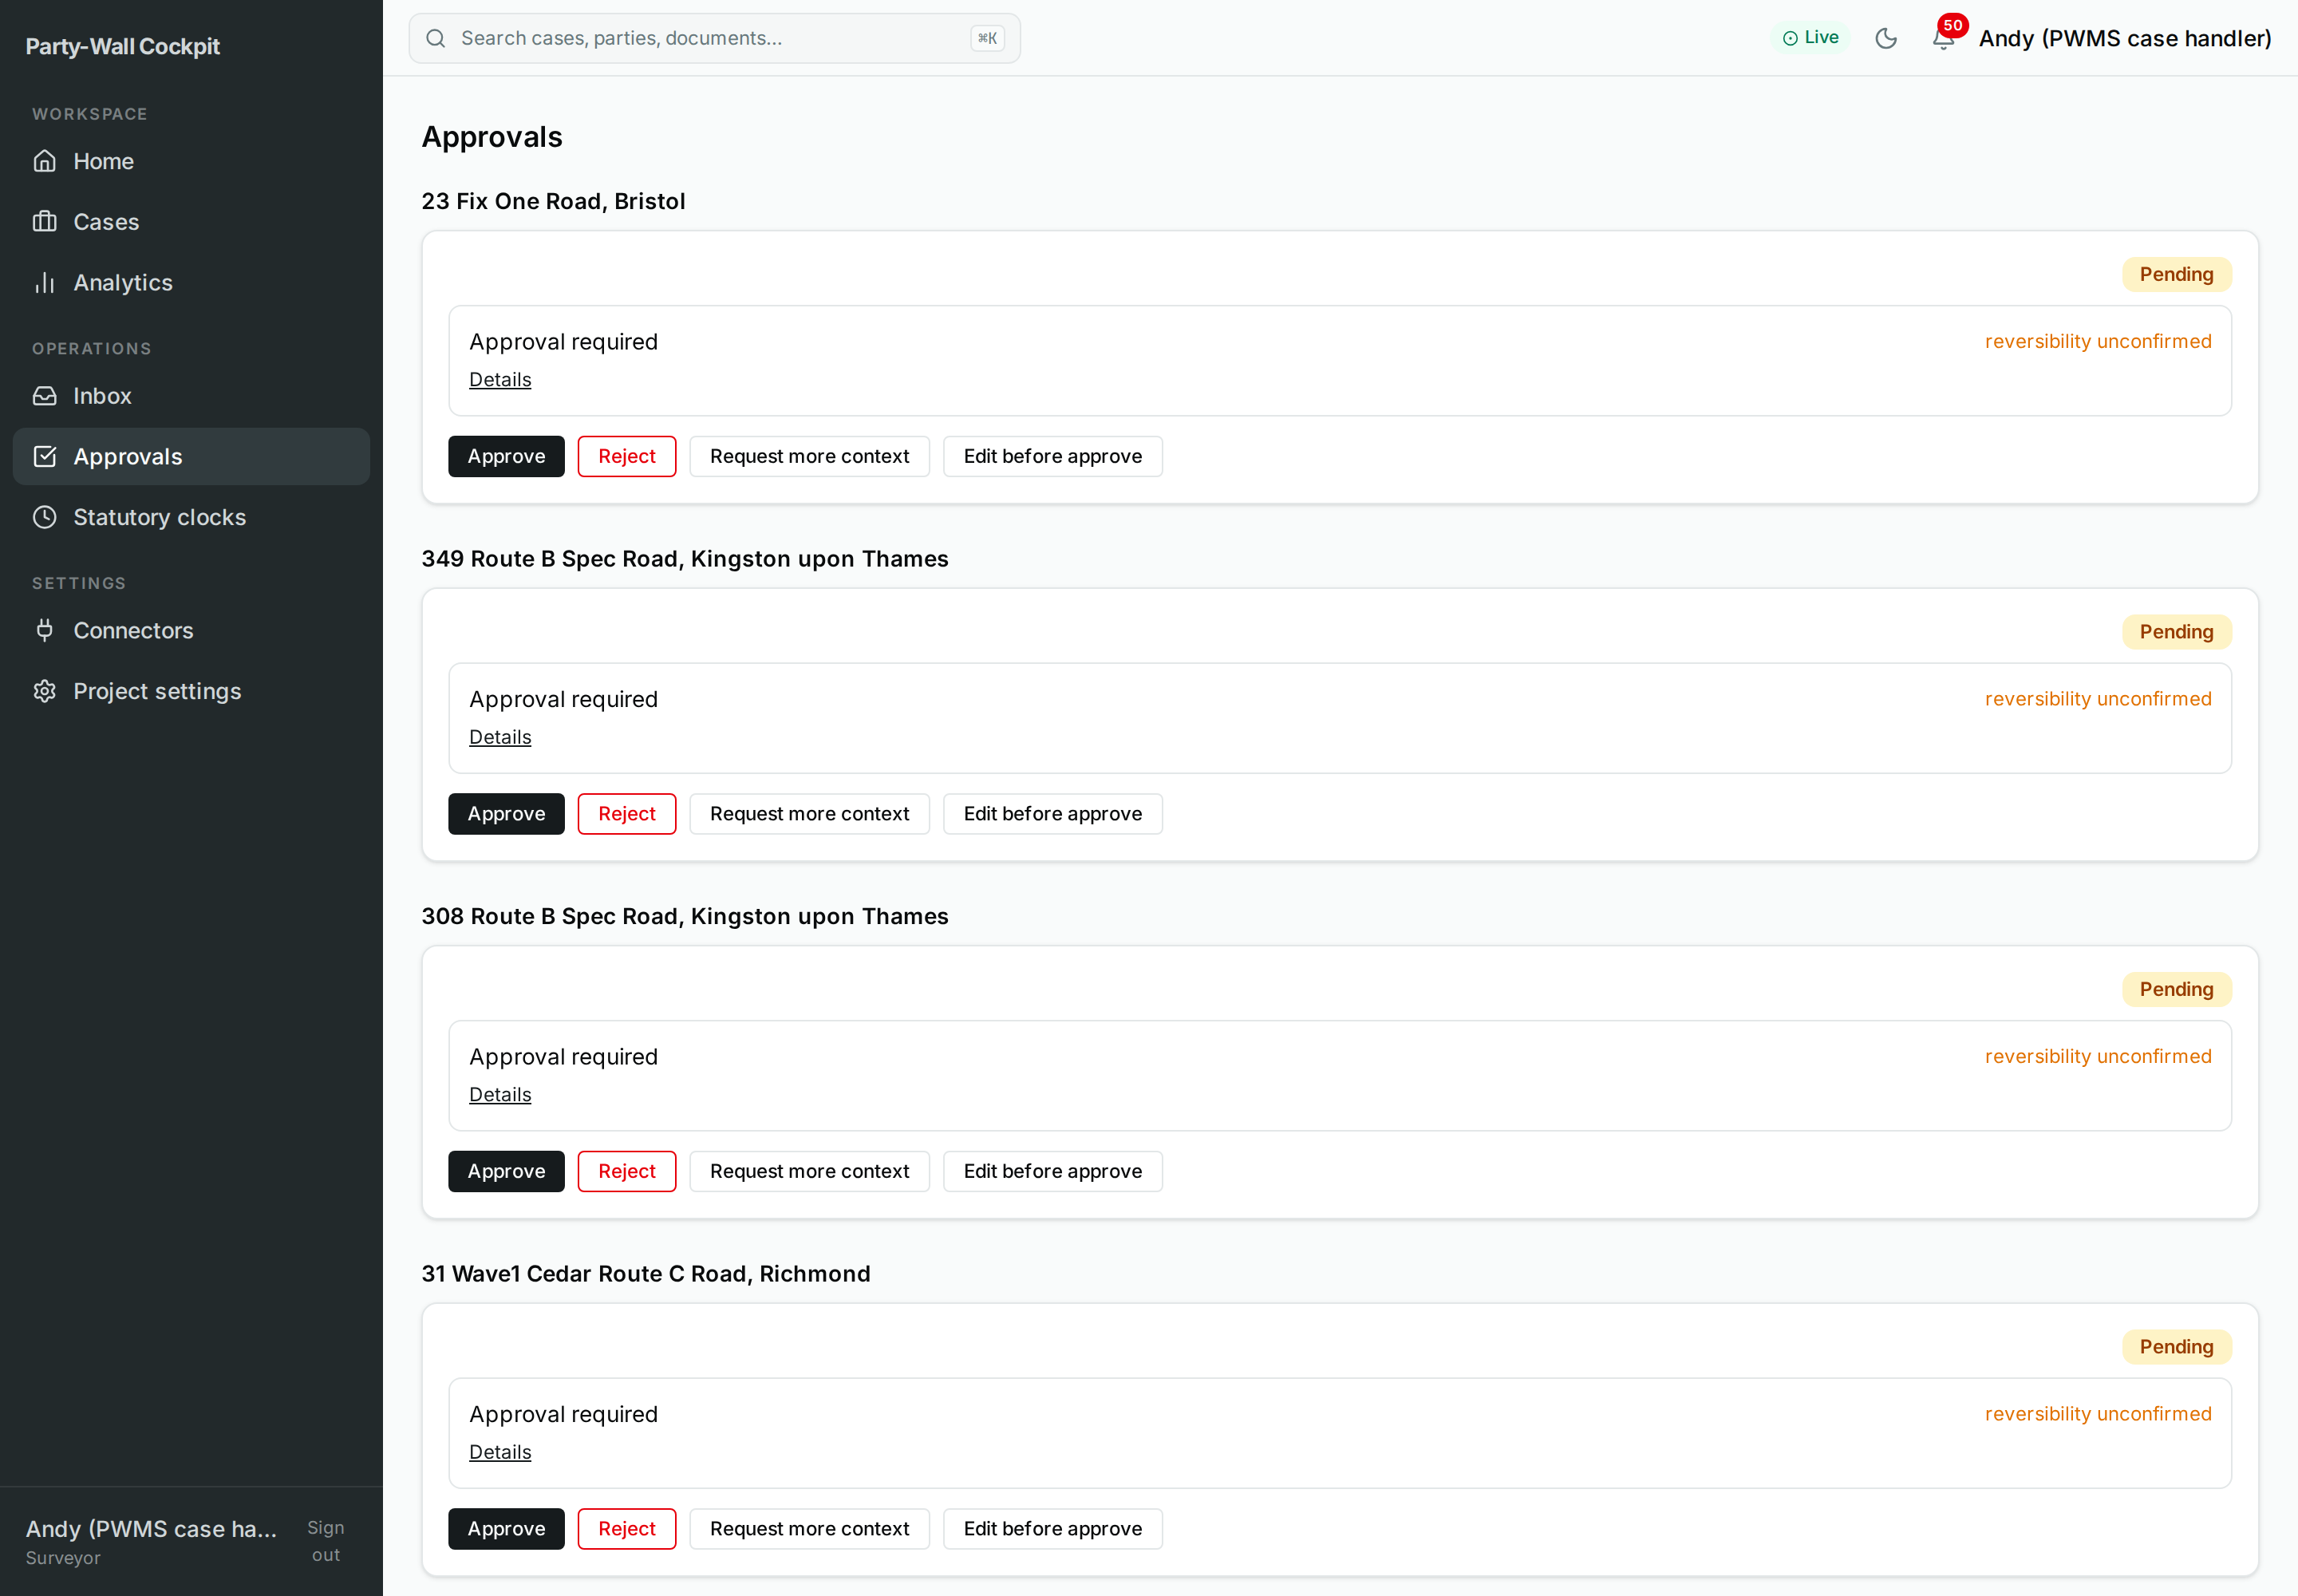 Figure — a serve gate awaiting your decision. Approve authorises the action behind the gate; nothing is sent until you approve.
- You click: on the case screen find the Requires your approval section (or open Approvals in the sidebar), read the gate, then press Approve. You can also Reject (a reason is required) or Edit before approve first.
- What happens: approving authorises the prepared serve. Only now does the outside act take place and the statutory response clock start for the neighbour.
- Safe? This is the deliberate go/no-go point. Read the gate before approving. On the Approvals page, avoid "Approve all" if any gate shows an anticipated cost or an "irreversible" badge — approve those one at a time.
Approve all authorises a batchable group at once
On the Approvals page, "Approve all (N)" authorises all the gates in a batchable group in one click, including any that are chargeable or irreversible. If a gate shows an anticipated cost or an irreversible badge, review and approve gates individually instead.
Step 7 — Record AO response (consent) → Route A
- You click: the Record AO response button, choose the adjoining owner from the Adjoining owner dropdown, paste the neighbour's reply into the Their reply box, then submit.
- What happens: the system reads the reply and opens a Confirm AO response route approval gate. The lane moves onto Route A only after you approve that gate — if the automatic reading looks wrong, use Reclassify first. Recording the reply alone does not set the route.
- Safe? Yes — recording captures what the neighbour told you; the route is only committed once you approve the route gate, so you get a second look before it is fixed.
Step 8 — Record SoC
- You click: Record SoC (confirm).
- What happens: this marks the Schedule of Condition as complete. On a consenting Route A case no Party Wall Award is needed — the case goes straight to works; Record Award applies to the dissent routes B/C/D (see Scenarios). It is a one-click milestone.
- Safe? Yes — it is a fact record with no outside effect. It tells the system where the case has reached.
Step 9 — Start works engine → Mark works done
- You click: the Start works engine chip (confirm), and later, when the building work is finished, Mark works done (confirm).
- What happens: the works engine begins monitoring the works; Mark works done records that they are complete.
- Safe? Yes — starting the engine begins monitoring, and the milestone is a fact record. Neither sends anything.
Step 10 — Start invoicing engine → Record invoice → Record payment
- You click: the Start invoicing engine chip (confirm), then Record invoice to log the client invoice (entity, bill-to, fee excluding VAT). When the money arrives, Record payment.
- What happens: the invoicing engine starts; Record invoice logs the invoice details; Record payment marks the invoice as paid.
- Safe? Recording the invoice and starting the engine are safe records — no invoice is pushed to any accounting system and no money moves (Xero automation is off; real payments stay outside Axon). Record payment is different — see the warning.
Record payment cannot be undone from here
Record payment manually marks the client invoice as paid. It is an override of the normal flow and cannot be undone from here. Use it only when you have confirmed the money has actually arrived.
Step 11 — Close case
- You click: the Close case button, then confirm. The dialog reads "Close this case? …It cannot be undone from here."
- What happens: the case moves to Closed and is finished.
- Safe? No — Close case is terminal and cannot be undone from here. Only close a case you are certain is complete.
Closing is final
Close case ends the case permanently and cannot be undone from here. Make sure the works are done and the invoice is settled before you close.
For your technician
The "Run stage" chips (Qualify / Set up / Determine notices / Serve notices / Start works engine / Start invoicing engine) all issue pw_cockpit_run_stage, which launches the stage workflows under the system account — this is the only real side-effect surface (Drive provisioning, notice generation, the statutory clock and serving via pw_serve_and_track_v1, and invoicing via pw_invoicing_v1), each behind an approval gate. Every other pw_cockpit_* button is a record-only facade (side_effect_class='internal') — _IRREVERSIBLE_ACTIONS = frozenset() is empty. Record invoice writes a Xero payload as metadata only and does not call Xero. Handlers live in core/api/commands/handlers/pwms_cockpit.py.
6. Options reference
The buttons you used on this path, in order:
| Button | Records / does | Sends anything? |
|---|---|---|
| Create case (wizard) | Draft case, status Prospect | No |
| Qualify case | Runs qualification; on approval sends the quote + mandate | Yes — after you approve the gate |
| Set up case | Provisions folder + connectors | No (the case is Live once the owner signs the mandate) |
| Determine notices | Decides which notices are needed | No |
| Serve notices | Prepares notices, opens approval gates | No — queued for your approval |
| Approve (gate) | Authorises the prepared serve | Yes — after you approve |
| Record AO response | Logs the reply; route set after you approve the route gate | No |
| Record SoC | Milestone fact record (Record Award applies to dissent routes B/C/D) | No |
| Start works engine / Mark works done | Starts monitoring / marks complete | No |
| Start invoicing engine / Record invoice | Starts invoicing / logs invoice | No — Xero automation is off |
| Record payment | Marks invoice paid (override) | No money moves — cannot be undone |
| Close case | Ends the case | Terminal — cannot be undone |
Full details of every button and dialog are in The Case Screen.
7. Lifecycle
- Prospect (P) — from the wizard, through qualification, until the building owner signs the mandate. The case is a draft.
- Live (L) — from the moment the building owner signs the mandate (which also triggers case setup): through serving, routing, SoC, Award, works and invoicing.
- Closed (C) — after "Close case". Terminal.
Other statuses you will meet in other paths (On-Hold, Abandoned, Referred) are covered in Scenarios.
8. Troubleshooting
| Symptom | Likely cause | What to do |
|---|---|---|
| No approval gate appeared after "Serve notices" | The serve stage is still starting, or the gate is elsewhere | Refresh; open the Approvals page or the Requires your approval section on the case |
| A button is greyed out | An action is still running, or you lack write access | Wait a moment for the current action to finish; if it persists, check you are in write mode |
| "Session expired — Please sign in again." | You were signed out | Sign in again and retry the step |
| The case is not moving but nothing shows an error | A statutory clock is running, or a gate is waiting on you | This can be normal — see the full guide |
The complete list, including "the case is stuck but there is no error", is in Troubleshooting.
9. Limits
On this path, some things are deliberately not automated:
- Land Registry is manual attach and verify.
- Finance uses email requests only; Xero automation is off.
- Referral records the hand-off only.
- Real payments and bank transfers stay outside Axon.
- Multi-signer and drawing vision are later-stage capabilities.
10. Related
- Cheat sheet — the same eleven steps on one page. Open it and print it to PDF to keep a handout by your desk.
- Overview — what the Cockpit is and how it fits together.
- The Case Screen — every button, dialog, status and panel.
- Scenarios — Routes B, C and D, rejecting a lead, escalations, on-hold chasers.
- Troubleshooting — symptoms, fixes, and when to call a technician.
- Glossary — party-wall and system terms.
Printable handout: the one-page Cheat sheet is designed to print onto a single A4 sheet — open it and use your browser's Print → Save as PDF.